Portfolio

Friday, 26 September 2014

Essential tools to save your photo

Have you ever captured a beautiful moment, but the photo turned out too dark? 
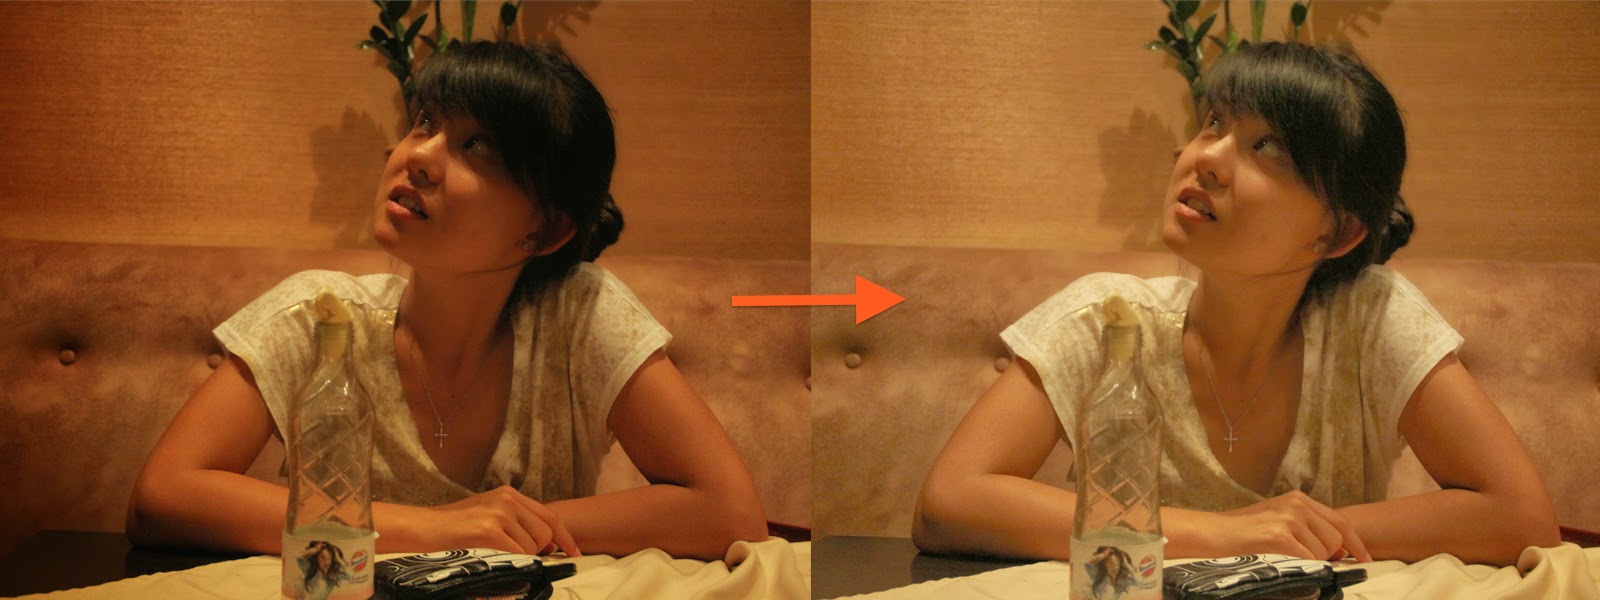
Introducing, Levels. The Levels tool adjusts brightness levels through 3 components: Image shadows, Midtones and Highlights. This allows you to edit the colour balance and tonal range of an image.
Adapted from: http://helpx.adobe.com/photoshop/using/levels-adjustment.html
So how do I use the Levels tool:

1. As you can see, this image is too dark. 


2. Select the tool

3. The image histogram is shown.

4. Sliding the Midtones and Highlights brightens the image.

 5. You can see that the Levels tool provides you with a lot more control in adjusting your image tones.

6. Here is a comparison between a general increase in Brightness and an adjust using the Levels tool.

Wanna know how to remove pimples? Stay tuned to next week's tutorial!


Thursday, 25 September 2014

Loving the colours on a photo and wondering how to recreate it?

Have ever been tasked to design a poster, but can't seem to find the right colours to match and mix? Here's a way to paint your photos by using natural colours. Introducing, the Eyedropper Tool.


 1.Open Colour Picker by clicking on the square boxes.

2. Selecting the Eyedropper tool, select on the colour you like. By clicking on the blue clouds, the Eyedropper tool shows me that the colour code for this particular blue is #2b374f.

3) By using the Eyedropper Tool, I am able to create a customised similar colour palate to paint my pictures.

Alternatively, if you are lazy and want quick preset colour themes, do check out Adobe Kuler at https://kuler.adobe.com/explore/most-popular/?time=month!

Tuesday, 23 September 2014

Dieting is easy on Photoshop

(Disclaimer: This post serves to explain the tool; keeping fit and healthy should still be part of your lifestyle. Also, this post serves to expose what Photoshop can do and remind you that what you often see in magazines etc. are not entirely true)
1. Open your image on Photoshop. Open Filter and select Liquify.
 2. Select the 'Forward Warp Tool'. Adjust your Brush Size and Brush Pressure. For the model below, I clicked and pulled inwards to make her look more skinny.
 3. In the image below, you can see that I have 'pulled in' her stomach. However, her right arm has not been edited yet.
4. After completing your edit, click OK to apply your changes. Once again, remember to add a layer mask. (If you are not sure what a layer mask is, you can refer to my previous post here!) Ensure your brush tool is coloured black and start painting over the distorted portions.
5. Although the distortion is minimal in this example, you can see the difference a layer mask makes.

Here is a more extreme example to illustrate the importance of layer masks to remove the unwanted distortion:


You can check out some of the most ridiculous photoshopped fails ever here: http://www.buzzfeed.com/elliewoodward/the-most-wtf-celebrity-photoshop-fails-of-all-time#1hc6kjo
Number 15 on this list is really... wow.

Let me know your thoughts about this! I would be glad to hear from you (: